Sunday, November 27, 2011

Thanks For Thanksgiving!

Isn't is funny how we all wait 365 days for that one day where we can stuff our faces without feeling any guilt at all? The one day out of the year where Gluttony is no longer a sin? 
I sure do love Thanksgiving! And my grandma's cooking....
So to add to all the holiday fun, I made these adorable cake pops!!!

My daughter would say "Gobble-Gobble" every time she seen this Turkey Cake pop. I caught her in the fridge a few times trying to sneak one, and shes only 2!!

The Turkey Cake Pops were covered in dark chocolate candy melts, caramel squares rolled into a ball for the head (not a good idea), orange tic-tacs for the nose, jumbo heart sprinkles for the 'gobble' pretzel sticks for the legs, black candy writer for the eyes, and candy corn for the tail-stuck on with left-over chocolate.

**The caramel kept melting on me no matter where I put it, so I would suggest using a caramel-colored hard candy for the head instead if you don't plan on serving them right away**

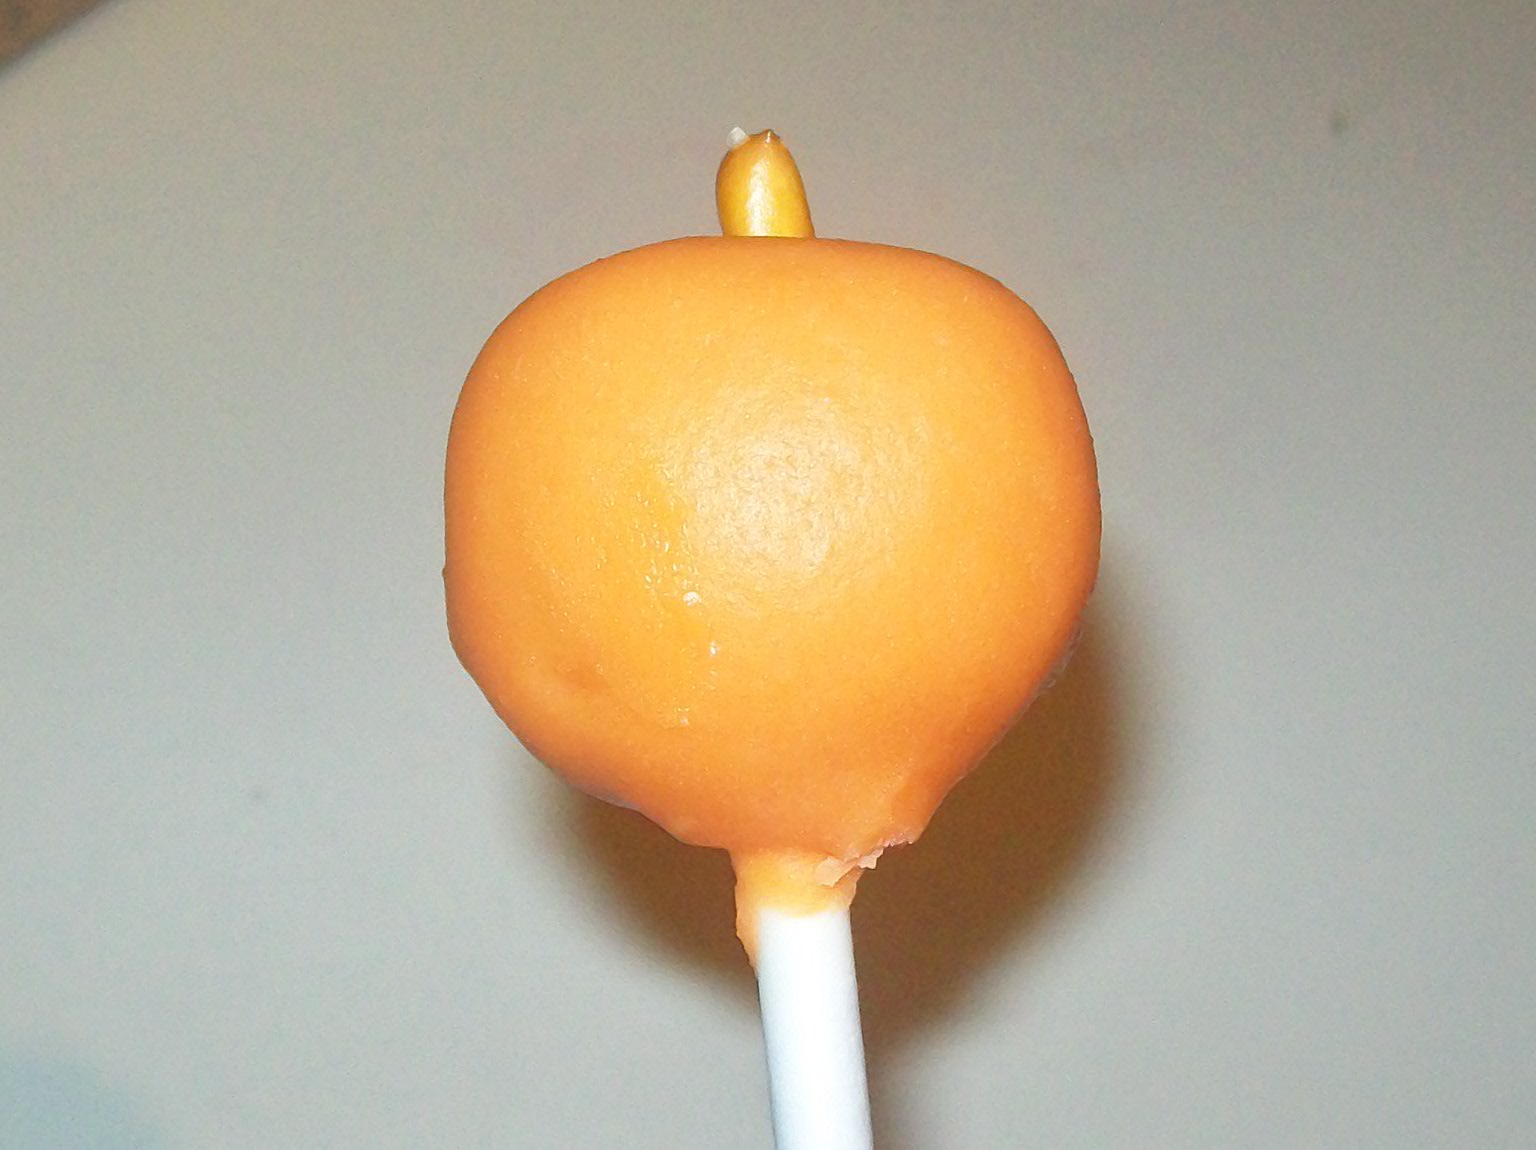
The Pumpkin Cake Pops were super easy. Just dip in orange candy melts and stick on a piece of pretzel for the stem. The cake pops were made out of Spice cake and cream cheese frosting. Very yummy!!

And here they are as a group!!! As you can see, the heads are no longer round and the chocolate is all messed up. This is where I woke up and found that the head all fell off, and I had to "glue" them back on. 

Now I can't wail till Christmas!! I have a lot of ideas for these cake pops. Between doing these Thanksgiving Cake Pops and eating Thanksgiving dinner every night for the past week, I'm all turkeyed out!! 
Enjoy!!!


Tuesday, November 1, 2011

Halloween Sweet Treats!

For Halloween this year, I decided to give cake-pops another go.. I tried it for a birthday party, but it came our horrible. But I've learned from my mistakes, as you always should. So this time was so much better and fun. They came out extremely cute, way better than I expected. 

For the cake-pops, I used carrot cake, cream cheese frosting, and white candy melts. 
I also had plastic bags and black ribbon to cover them with. 
  
Here is the Mummy and Confetti cake-pops. I decorated the eyes with black frosting coloring, but then I had to cover it with red sprinkles so it wouldn't smear when I put the plastic over it. 
I used halloween sprinkles for the Confetti pops.

For the Pumpkin cake-pops, I had to put copper food coloring into the white candy melts to get an orange color ( Everyone was sold out of the orange candy melts and orange food coloring). I used black coloring, a green tic-tac for the stem. 

The Skull was just decorated with black food coloring and red sprinkles. 


 Thats all there is to it!! Have a Hallowicked day!!!


Sesame Street Sweetness!

For Evalyn's 2nd Birthday, I did a Sesame Street theme with the red, yellow, blue, and green colors. We had her party at the park on a beautiful cool and sunny day. Everything was decorated and created by hand, including the sweets and decor. The cupcakes were my absolute favorite. They were easy, cute, and so fun to make. 


I found this invitation online, which was actually the inspiration for her party decorations and cupcakes. 

For the Cookie Monster cupcake, I used blue frosting, half a chocolate chip cookie for the mouth, and candy eyes, and the cake was chocolate. 

Oscar the Grouch was chocolate cake with green frosting. I used black gel icing for the mouth, red frosting for the tongue, candy eyes, and bits of chocolate for the eyebrows. Notice I used silver cupcake wrappers to look like a tin garbage can. 

For Elmo, I used strawberry cake, red frosting, candy eyes, black icing gel for the mouth, and an orange tic-tac for the nose. I would recommend using an orange candy that more of a circle though. 


For these cupcakes, I just used confetti cake, white vanilla frosting, and rainbow sprinkles. 

I didn't get a picture of her smash cake, but it was a simple white cake with white frosting and huge rainbow sprinkles that I purchased from Target. It went perfectly with the theme. 

The decorations were really easy, I used construction paper to make each characters face, the banners, and the food labels.


A fun idea I had was to make food labels to go with each Sesame Street character.  


I had these tubs from Evalyn's 1st birthday party, so I cut our letters and numbers and pasted them on. I used each on to hold lollipops and the different colored silverware wrapped in a napkin. 


 And then I had everyone where Sesame Street shirts!!! 

This party was a blast!! Hope you enjoy!!!

Sunday, October 9, 2011

Dalmatian Cookies!!!

So, Saturday was my baby brother's 1st birthday party!! Time sure does fly, doesn't it. My mom chose to do a firetruck-themed party. 

So, to go along with the theme of the party, I decided to do dalmatian sugar cookies with white vanilla frosting. These were super easy to make and so fun to decorate.
(p.s. the date on the photos are wrong) 

The ears were made from Oreo cookies, cut in half. I used a mini marshmallow for the nose and black gel icing for the eyes, nose, and spots. And then I used red gel icing for the tongue. 

My mom had a family friend, Shandi, make his birthday cake, which came out just wonderful. I swear, she's gifted when it comes to baking. 

Like I said, very simple and really fun to make. 
Feel free to leave your comments on what you think!!!

Friday, October 7, 2011

Halloween

I had so much fun making this is the Halloween inspired cake that I made for Sammy, my 7 year old brother-in-law last year. Its a 2-tier chocolate cake with chocolate frosting. I decorated it with candy pumpkins and plastic fall leaves. Trust me, it was frighteningly delicious!!! 


For the tombstones, I shaped a milk Hersheys chocolate bar and covered them in powdered sugar. Then I crumbled the rest of he chocolate and used it as the grave dirt. 

If I remember right, I purchased this cupcake holder from the dollar store, as well as the spiders. I made these super easy vanilla cupcakes with vanilla frosting and Halloween orange, black, and white sprinkles. 

Thursday, October 6, 2011

My Lil' Ladybug Evalyn!

    So, last year for my daughters first birthday, I decided to do a ladybug theme and incorporated everything with black, red, and white colors. Most of her decorations were handmade, including her invitations. I've never hosted a party before, nor have done a big cake like the one she had. It was fun making them, but very time-consuming.  However, everyone ended up loving the party and we had so much fun!!! Which made all the hectic moments well worth it....
 This was my first time working with fondant. The cake was chocolate, vanilla, and strawberry with vanilla frosting. I made marshmallow fondant from a recipe I found online, and food dye to stain the red layer of fondant. The red ladybug on top was used as the smash cake. 
For the smash cake, I used a round oven-proof bowl for the body and used a cupcake for the head.  I also used the black pipe cleaners for the antennae. 

For the invitations, I used construction paper, googly eyes, and pipe cleaners. I also cut the ladybug wings in half so that they would open up, using a pin to hold it all together. The "Evalyn's 1st Birthday" was printed out on red construction paper  

 I decorated the frames with ladybugs stickers that I found at Walmart. 

 I bought these tags from Walmart to go around the cookie pops that I made. 
This was a cute idea that everyone adored. I acually attached the ribbon (red ribbon that I drew black dots on) to a larger ladybug made out of construction paper, which was also made with googly eyes and pipe cleaners. 

I got the idea for this banner from a website online. This was made out of construction paper and ribbon. I made the flower shapes using cups and bowls to trace. 

Here, you can see the cookie pops that I made, and the silverware wrapped in a white napkin, tied it with a black ribbon and red ribbon with white dots. I found the red tub at Target in the dollar section, and I drew on black dots.
This is Evalyn on the morning of her birthday!  I guess shes a morning person.... I have no idea where she gets that from. =D
 And that's the party! Hope you enjoyed what you've seen. Hopefully it was as fun for you as it was for me. Please come back for more soon!!! Don't be shy, and tell me what you think......